Showing posts with label Repurposing. Show all posts

04 July 2012

Baby Nursery Intro

Since my last post, I've made lots of things such as duvet covers, pillows, topiary, etc., including Averi's nursery bedding (bumpers included :) and matching curtains/ruffled valance, but have yet to take pictures. I've just been too busy to post. I'm actually over her nursery decor now, ha (which is white and a light mauve with a ruffley, classy, dainty feel) and want to bring in some bold color. I change my mind a lot. Future plan: take pics and post! I have alot of friends who are preggers right now and searching for the perfect decor. That was me a year and a half ago. I searched and searched and was willing to pay for anything I fell in love with - my first (maybe only) girl HAD to have the perfect nursery. My prob was, I never found anything I liked. Everything was so over-used and over-done. I didn't want butterflies or flowers or winnie the pooh. I didn't want chocolate brown and pink. I wanted something original and special. So I gathered ideas and made my own stuff. I was pleased with how it turned out, but now my baby is getting to be a toddler and I just feel like upscaling. So I'm starting over. Only this time, I'll be sharing it online. Plus I never got to finish ALL the projects I had planned for her so this will be a good excuse to git-er-done.
Upcoming Tutes on Baby Nursery Decor:
-Baby Bumber Cover (easy peasy!)
-Ruffled Valance & Curtains (also surprisingly easy)
-Revamped Dresser (from brown to white)
-Painted Shelf & Decor
-Fitted Crib Sheet
-Crib Dust Ruffle
-Basket Liner (I already have a tute for that, but this one will be a bit diff cuz it has handles)

I already found the perf fabric at Hobby Lobby that brings in the bold color I want and ties in the 'morning mauve' color of her walls so it was a huge plus. I DON'T want to re-paint.
Excited to get started! I have many ideas, I just need to make time for them to come to life.
The walls look pretty light in this pic, but when in the room, you can see the color better

07 September 2011

Framed Tin Magnet Board

This project cost me under $7- which was just for the sheet of tin (on sale at Home Depot.)
Frame from my mom's garage, already had the ribbon, mod podge, paint,and screws.
If you want to make your own, hit up your mom's garage. or your own. or a thrift store, yard sale, whatev.
 
I'm sure this was nice to someone sometime, but not so much anymore. Outdated to say the least.
(Sorry to whoever painted this. Good things don't last forever, ya know?)
Which is why my mom was excited to get rid of it. Lucky for me.
Paper border? yep.
Most of it peeled right off, but for the stubborn areas, a wet washcloth dipped in fabric softener works miracles. and a butter knife :)

After I got all that fabulous paper off, I painted it white with a foam brush.
(Foam brushes work best if you have to paint over lots of groves.)
While waiting for the paint to dry, cut out strips of ribbon to make a border. You can use fabric, wall paper, scrapbook paper, etc. Using a foam brush, paint a layer of mod podge directly onto the artwork and lay down the ribbon. If your frame came without pretty art (lucky you), cut out a thick piece of cardboard, cork board, or thin plywood. Rub out any wrinkles or air bubbles in your border. Then paint a layer of mod podge right on top to seal it.
 Once it's all painted with mod podge, let it dry. Go back and paint a second coat on your frame, if necessary.
Then make your husband drill a hole in each corner of the tin.
Unless you're one of those cool chics and can do it yourself.
Twist those screws right down into the artwork/cardboard.
Yes, it actually stays. I'm amazed too.
Then have your husband cut off the sharp ends in the back with his Dremmel tool.
Again, unless you're a cool chic.

and make your husband hold it up while you take a picture :)
...and enjoy decorating with these easy and cute magnets you can make yourself.
I'm pretty sure you can also use dry erase markers on tin, but I haven't actually tried it.
You can use for pictures, notes, whatever.
I love how it turned out.

Thanks for your help, babe.

17 January 2011

Fabric Bracelets

You can easily make your own bracelets with some fabric and sass.
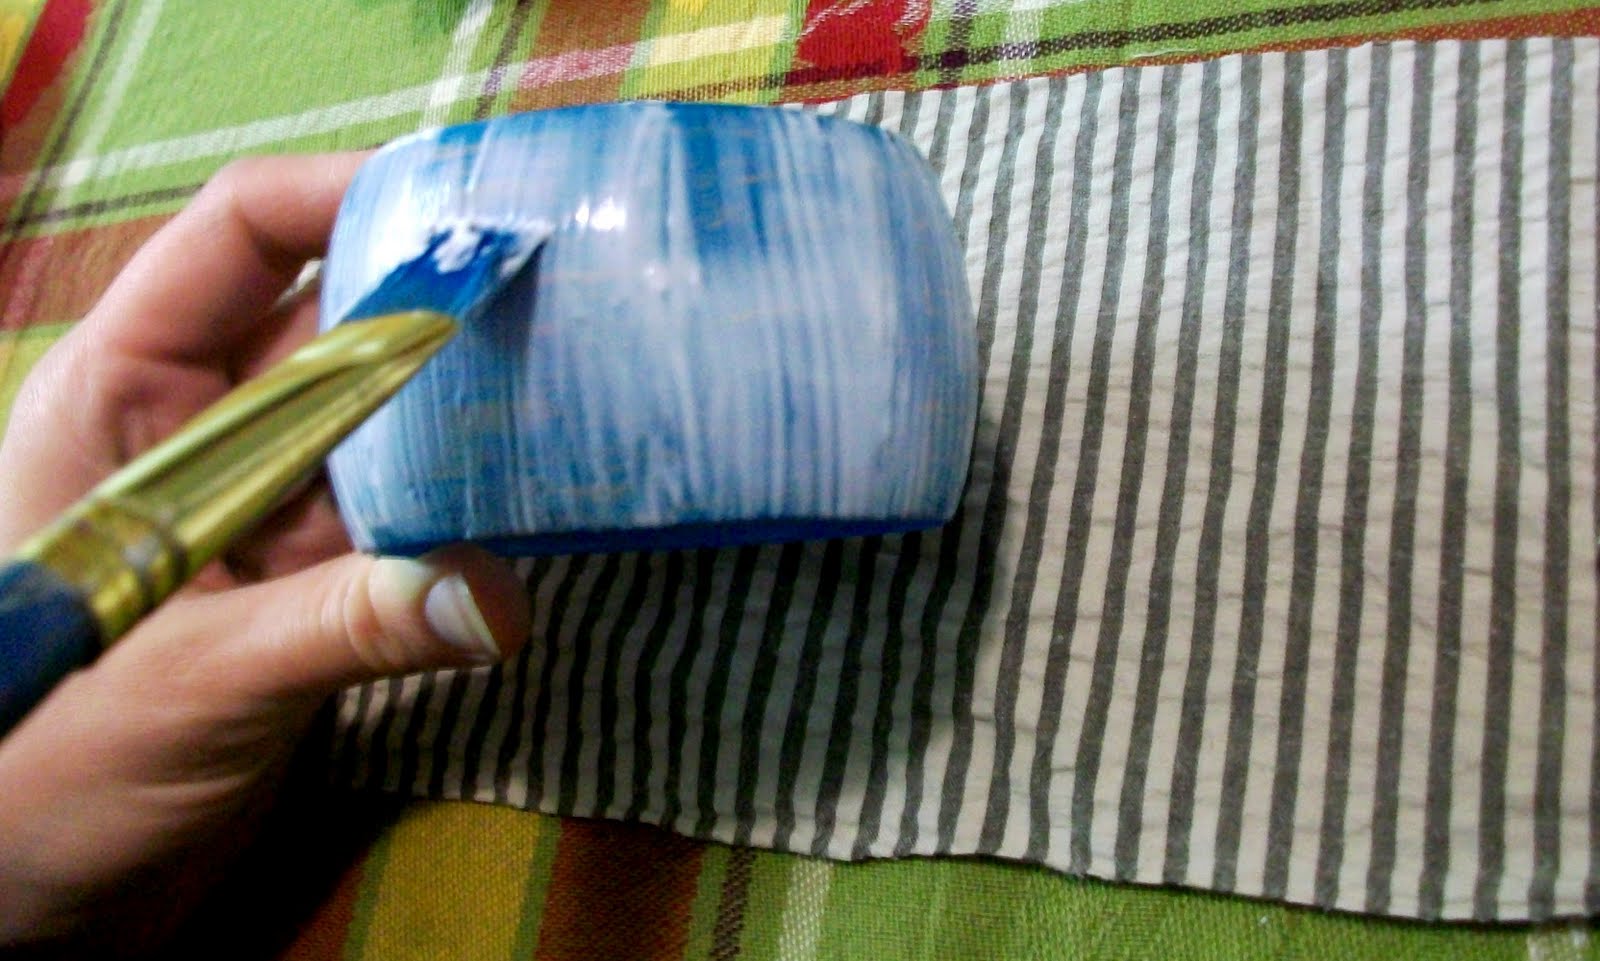
These plastic bracelets are cute for someone somewhere I'm sure, but I think they look much better when personalized :)
All you need is fabric, fabric glue, and a bracelet for recovering.
Start by cutting out a rectangle piece of fabric. (make sure it is long enough to cover the whole thing. It's better to have it too long than too short -you can always cut off the excess later.)
Paint a layer of fabric glue right on top of the bracelet, then slowly wrap the center of the fabric around making sure it sticks to the glue, pressing out any bubbles in the fabric.
Once it's wrapped around it completely, cut off any excess fabric if necessary.
Paint a layer of glue on the inside of the bracelet and wrap the fabric, one side at a time, underneath it. Dab a little glue over the raw edge on the inside to make sure it doesn't fray later on.
Then decorate as you wish!
I glued some lace around the whole thing, then made 3 fabric flowers and hot glued them over some tulle.
This one I used ribbon and glued a lacey ruffle over it by sewing a gathering stitch. Then used some glitter glue to sass it up a bit.
These were definitely fun [and easy] to make.

15 January 2011

Vintage Magnets

Who doesn't need more magnets? Yes, I know they say it's tacky to keep your refrigerator cluttered with papers, lists, and blah blah blah... but I say with cute magnets, who cares? I'll have one disappointed 5 year old if I remove one fridge-worthy paper creation even so much as an inch! And no, I don't plan on using all these magnets strictly for my kitchen kindergarten display board...they make a great little gift.
All you need is some scrapbook paper...
Mod Podge, scissors, round magnets (i bought an 18 pk at walmart for under 3 bucks) , and round accent gems. You know those flattened marble things used for...not really sure what they're used for, but I see them everywhere. ?? You can buy a pound of them at the dollar store. They have all different shapes too.
This scrapbook paper was inspired by vintage nursery rhymes, but it'd also be a good idea to hit up a thrift store and buy an old vintage book with pictures or shakespeare quotes. Same idea.

Place the flat marble over the picture you want to capture, then trace around it. When you cut it out, you'll have to cut smaller than the trace-lines since the edges are rounded and you don't want the paper sticking out the backside.
Paint a thin layer of Mod Podge on the flat side of the marble.
Then place your picture face-down on top of the glue. The flat marbles I used were not perfectly round, so I had to make sure to line up the shape just right.
Make sure there are no bubbles in the paper, then paint another layer of Mod Podge over the backside of the picture. Lay flat and let dry completely.
Once dried, place a good amount of hot glue on the backside...
then place a round magnet right on top. Press down and hold until hot glue is hardened.
That's it!
You can easily create custom magnets to suit your style.
It's like looking at a mini picture blown up or reading a mini poem through a magnified glass. MARVELOUS! :)
To give out as gifts, I cut out small rectangled pieces of fabric and sewed super simple bags.
Fill it with magnets and tie some lace or ribbon around it.
Each one held about 5 magnets.
i enjoy cute ways to give simple gifts :)

07 September 2010

Mod Podged Tin Can / Craft Room Part 2

I'll admit, I'm addicted to these mint chocolate Pirouettes.
But ONLY because I need the can(s) for my crafts.
YA RIGHT!!
I'm Mod Podging this tin can because I need a round sturdy somethin' to hold all my paint brushes in my new craft corner.
After cutting out a piece of scrapbook paper that will fit perfectly around this tin, I painted a light layer of Mod Podge (Matte) onto the can.
Then I lined up the paper to the bottom edge of the can and wrapped the paper carefully around it making sure there were NO bubbles and leaving an inch of extra paper at the top.
Before I folded the paper over the top, I cut slits (an inch apart) around the top, then glued (under and over the paper) as I folded each section over at a time. This keeps the paper from tearing and makes a clean edge. I added a good layer of Mod Podge over just the top rim instead of the whole can - which you can do if you want.

Then I painted a nice layer of Mod Podge over the seam in the back to keep it sealed down.
To add a little something extra, I painted some Mod Podge on the backside of a piece of ribbon...
...and placed it snug on the can.
ALL DONE. A lovely tin can to hold my paint brushes. P.S. My husband drilled a hole in the back seam so I can hang it up on the peg board in my new craft corner.

Love my man and his power tools.

03 September 2010

Mod Podge Box / Craft Room Part 1

We're moving soon and one of my new projects is to create myself a craft room. Actually, a craft corner since I have to share the spare with hubby.
This is one of the many storage cubbies I'll be making and using to organize my craft supplies. It's a Mod Podged box. It was a wooden basket, but those were the days...
It came from this pile of junk I picked up at a thrift store. I'll be making these ugly useless objects into beautiful useful somethings - all toward the plan: Delight's Craft Corner
Decided to first remodel the hideous wooden basket by ripping out the handle. I had to use pliers and these tiny staples were actually a huge pain in the butt - but I worked through it.
I ripped off the ugly piece of wallpaper that was glued to the front, then picked out my scrapbook paper, and cut each piece out accordingly. Make sure they fit!
Then with a sponge brush, I painted a light layer of Mod Podge right on the wood, then place my paper pieces directly on top.
I repeated this step over the whole outside of the basket. (or box, whatever you want to call it)
Then I painted a light layer directly OVER the paper and made sure to push out any bubbles (very carefully). It can get sticky and rip up the paper if you mess with it too much.
Then I let it dry and TaDa!!!.....
A sassy Mod Podged Box - which I'll be using to organize my craft supplies.
Can't wait to move.